Create Class From Azure Easy Table Universal Windows App C
This browser is no longer supported.
Upgrade to Microsoft Edge to take advantage of the latest features, security updates, and technical support.
Tutorial: Create your first Universal Windows Platform application in Visual Studio with XAML and C#
Applies to: ![]() Visual Studio
Visual Studio ![]() Visual Studio for Mac
Visual Studio for Mac ![]() Visual Studio Code
Visual Studio Code
In this introduction to the Visual Studio integrated development environment (IDE), you'll create a "Hello World" app that runs on any Windows 10 or later device. To do so, you'll use a Universal Windows Platform (UWP) project template, Extensible Application Markup Language (XAML), and the C# programming language.
Create a project
First, create a Universal Windows Platform project. The project type comes with all the template files you need, before you've even added anything!
-
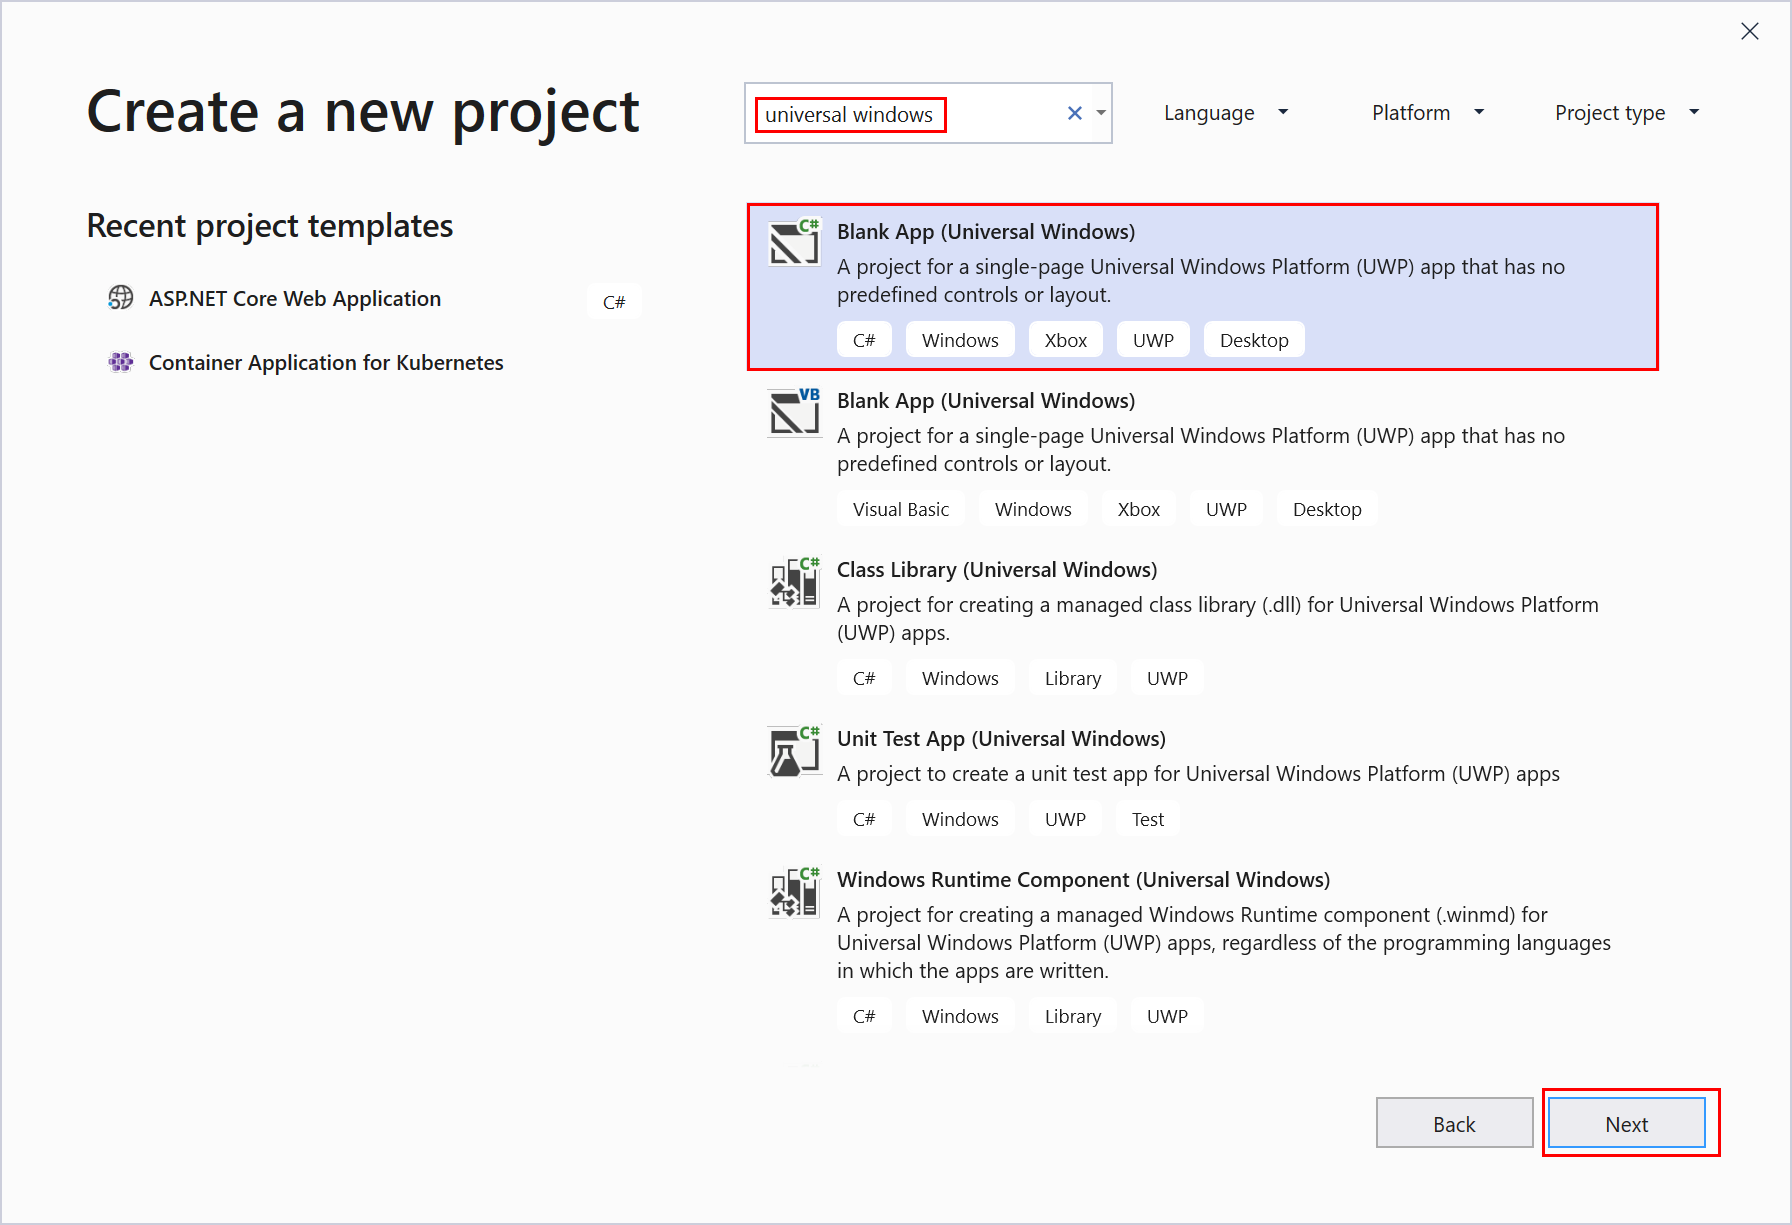
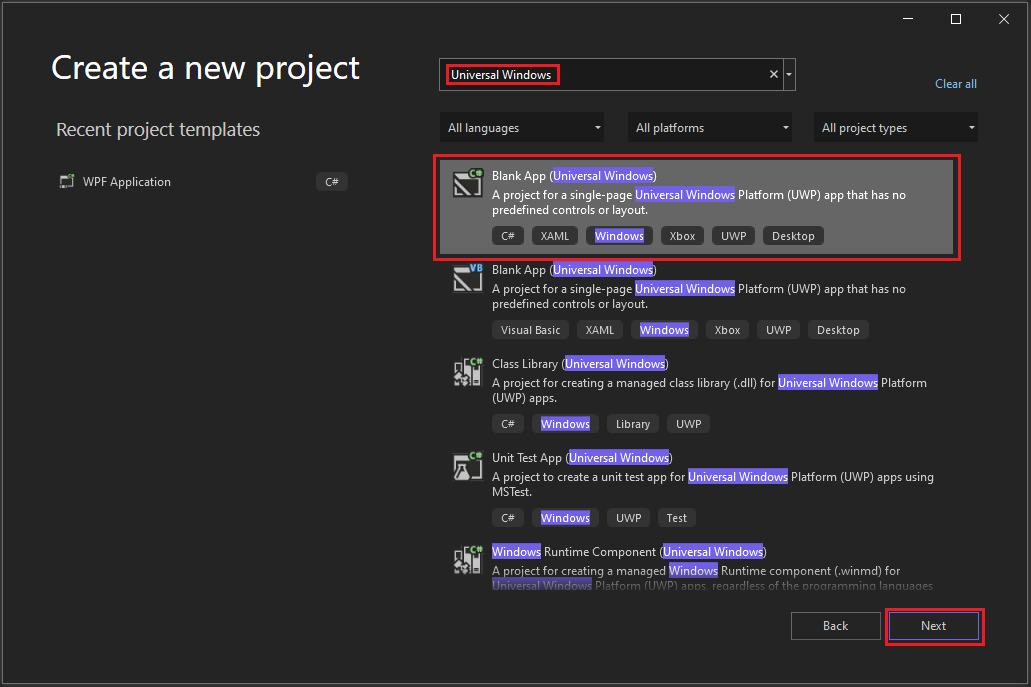
Open Visual Studio, and on the start window, choose Create a new project.
-
On the Create a new project screen, enter Universal Windows in the search box, choose the C# template for Blank App (Universal Windows), and then choose Next.
Note
If you don't see the Blank App (Universal Windows) project template, click the Install more tools and features link.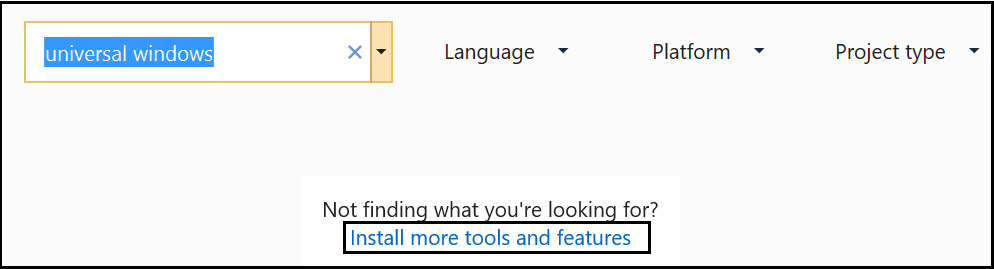
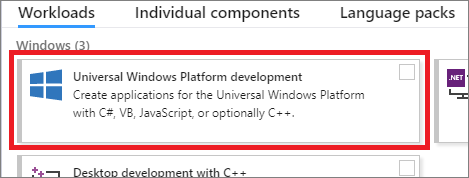
The Visual Studio Installer launches. Choose the Universal Windows Platform development workload, and then choose Modify.
-
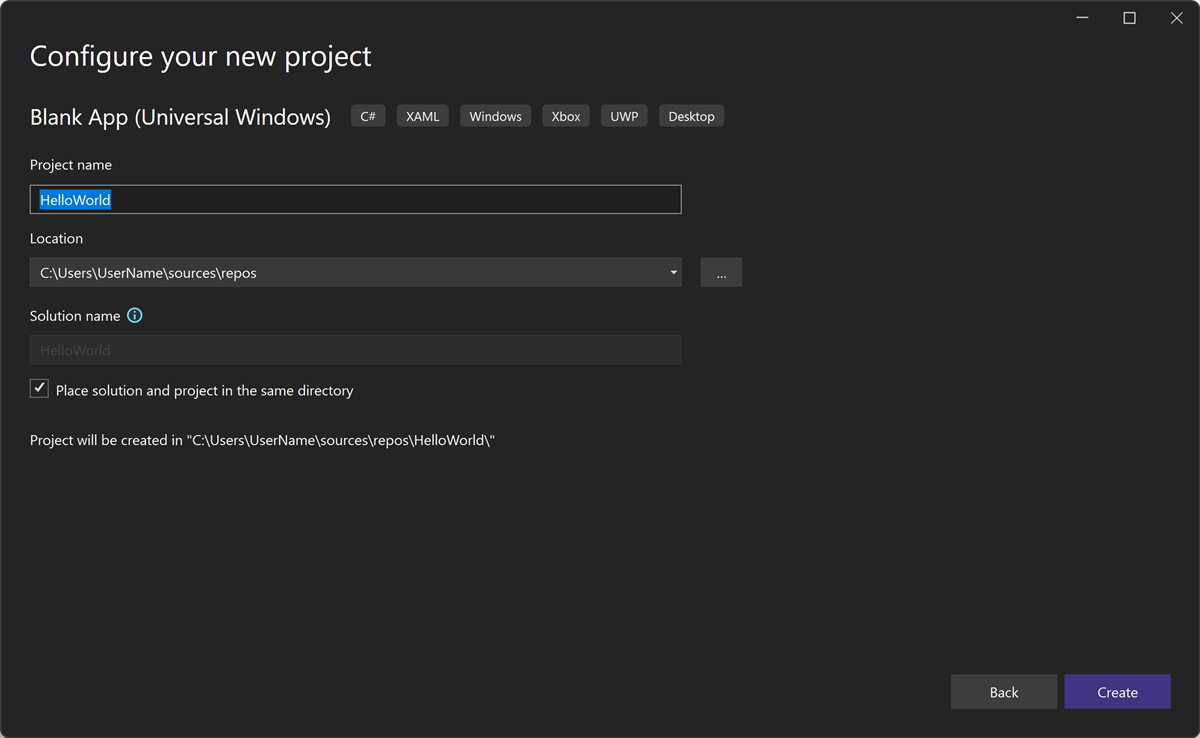
Give the project a name, HelloWorld, and choose Create.

-
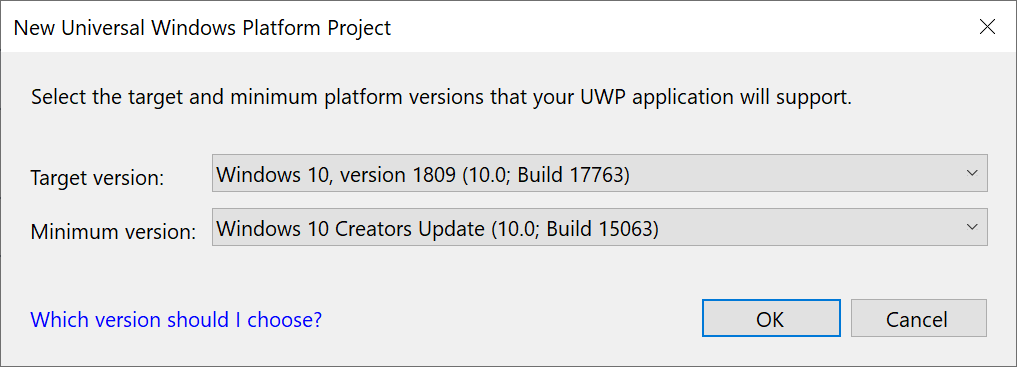
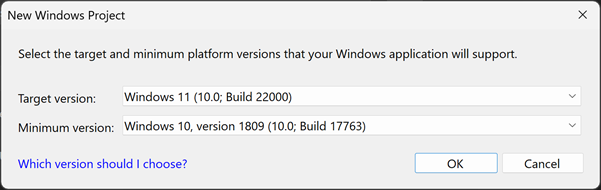
Accept the default Target version and Minimum version settings in the New Universal Windows Platform Project dialog box.
-
Open Visual Studio, and on the start window, choose Create a new project.
-
On the Create a new project screen, enter Universal Windows in the search box, choose the C# template for Blank App (Universal Windows), and then choose Next.
Note
If you don't see the Blank App (Universal Windows) project template, click the Install more tools and features link.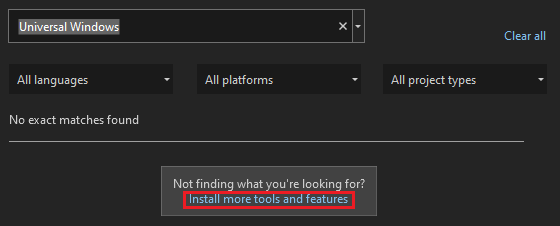
The Visual Studio Installer launches. Choose the Universal Windows Platform development workload, and then select Modify.

-
Give the project a name, HelloWorld, and choose Create.
-
Accept the default Target version and Minimum version settings in the New Universal Windows Platform Project dialog box.
Note
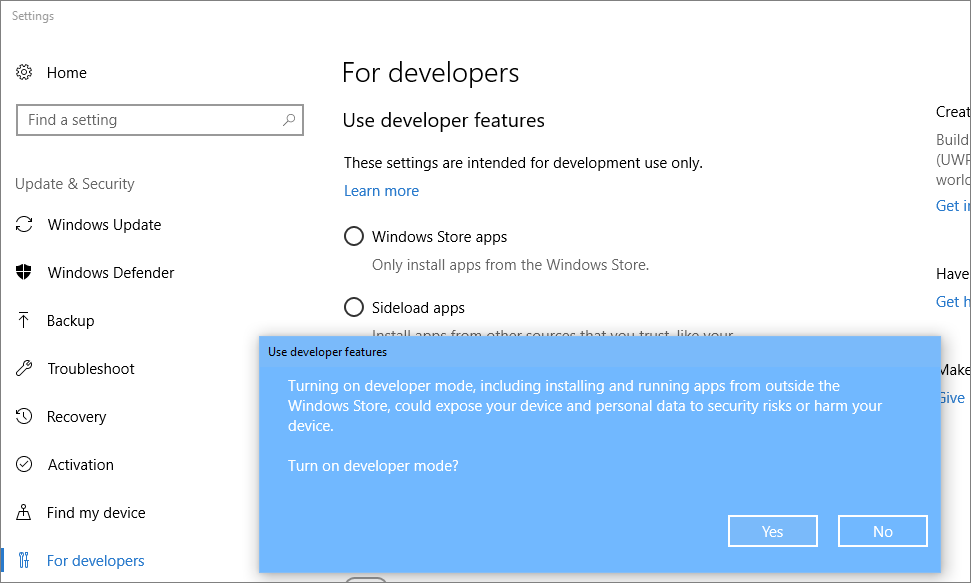
Visual Studio installs an additional Developer Mode package for you. When the package installation is complete, close the Settings dialog box.
Create the application
It's time to start developing. You'll add a button control, add an action to the button, and then start the "Hello World" app to see what it looks like.
Add a button to the Design canvas
-
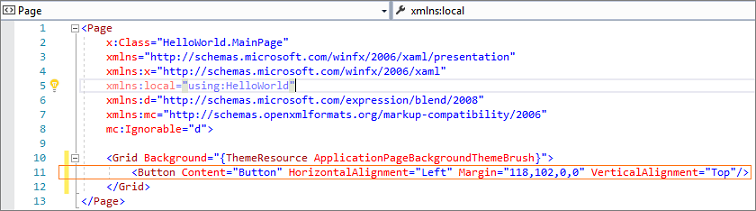
In the Solution Explorer, double-click MainPage.xaml to open a split view.

There are two panes: The XAML Designer, which includes a design canvas, and the XAML Editor, where you can add or change code.

-
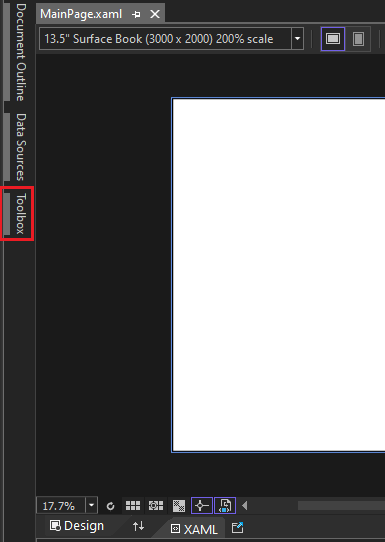
Choose Toolbox to open the Toolbox fly-out window.
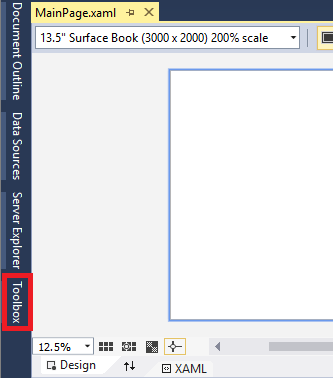
(If you don't see the Toolbox option, you can open it from the menu bar. To do so, choose View > Toolbar. Or, press Ctrl+Alt+X.)
-
Click the Pin icon to dock the Toolbox window.
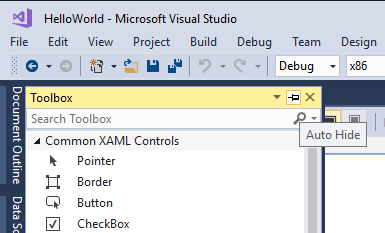
-
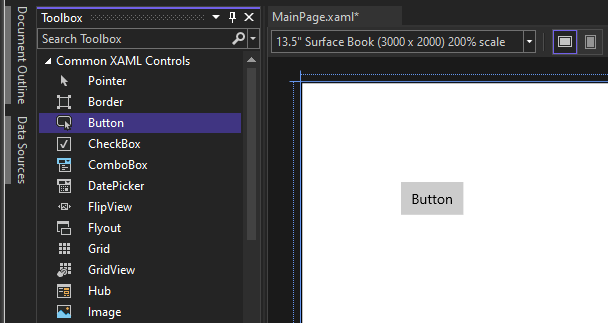
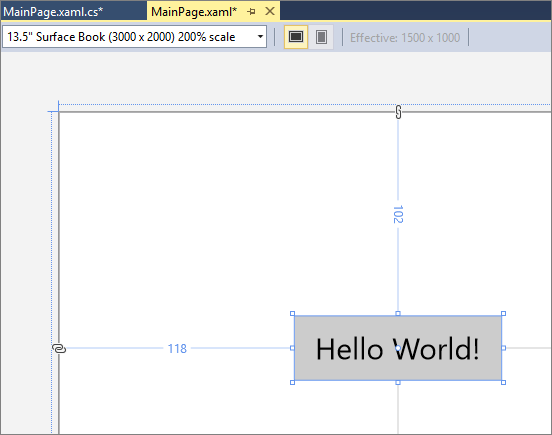
Click the Button control and then drag it onto the design canvas.
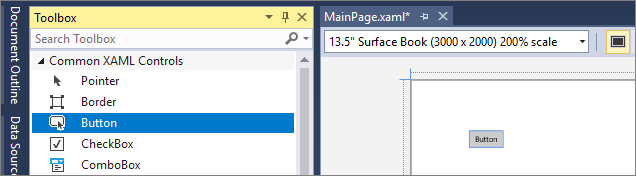
If you look at the code in the XAML Editor, you'll see that the Button has been added there, too:
-
In the Solution Explorer, double-click MainPage.xaml to open a split view.

There are two panes: The XAML Designer, which includes a design canvas, and the XAML Editor, where you can add or change code.

-
Choose Toolbox to open the Toolbox fly-out window.
(If you don't see the Toolbox option, you can open it from the menu bar. To do so, choose View > Toolbar. Or, press Ctrl+Alt+X.)
-
Select the Pin icon to dock the Toolbox window.

-
Select the Button control and then drag it onto the design canvas.
If you look at the code in the XAML Editor, you'll see that the Button has been added there, too:
Add a label to the button
-
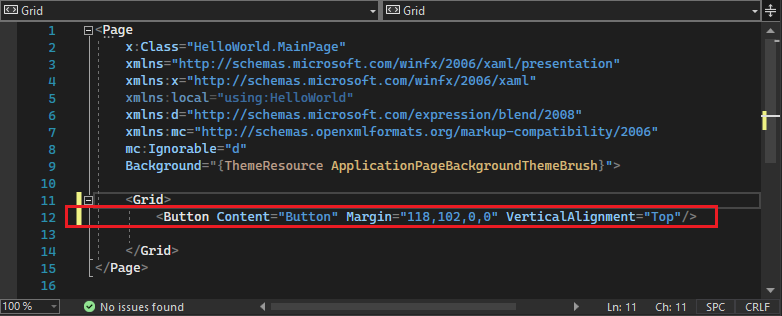
In the XAML Editor, change Button Content value from "Button" to "Hello World!".

-
Notice that the button in the XAML Designer changes, too.
-
In the XAML Editor, change Button Content value from "Button" to "Hello World!".

-
Notice that the button in the XAML Designer changes, too.
Add an event handler
An "event handler" sounds complicated, but it's just another name for code that is called when an event happens. In this case, it adds an action to the "Hello World!" button.
-
Double-click the button control on the design canvas.
-
Edit the event handler code in MainPage.xaml.cs, the code-behind page.
Here is where things get interesting. The default event handler looks like this:

Let's change it, so it looks like this:
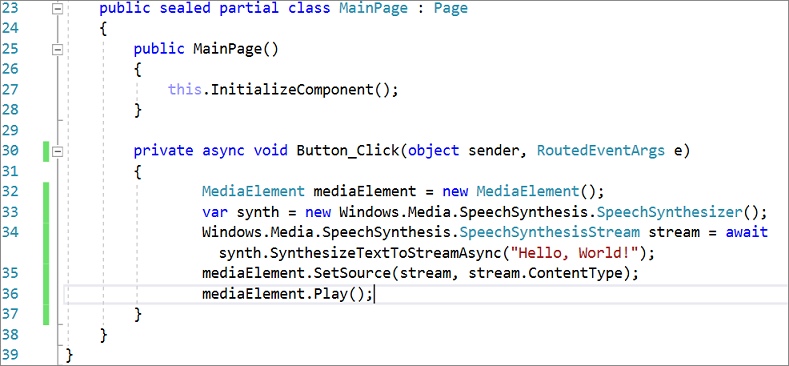
Here's the code to copy and paste:
private async void Button_Click(object sender, RoutedEventArgs e) { MediaElement mediaElement = new MediaElement(); var synth = new Windows.Media.SpeechSynthesis.SpeechSynthesizer(); Windows.Media.SpeechSynthesis.SpeechSynthesisStream stream = await synth.SynthesizeTextToStreamAsync("Hello, World!"); mediaElement.SetSource(stream, stream.ContentType); mediaElement.Play(); }
-
Double-click the button control on the design canvas.
-
Edit the event handler code in MainPage.xaml.cs, the code-behind page.
Here is where things get interesting. The default event handler looks like this:

Let's change it, so it looks like this:
Here's the code to copy and paste:
private async void Button_Click(object sender, RoutedEventArgs e) { MediaElement mediaElement = new MediaElement(); var synth = new Windows.Media.SpeechSynthesis.SpeechSynthesizer(); Windows.Media.SpeechSynthesis.SpeechSynthesisStream stream = await synth.SynthesizeTextToStreamAsync("Hello, World!"); mediaElement.SetSource(stream, stream.ContentType); mediaElement.Play(); }
What did we just do?
The code uses some Windows APIs to create a speech synthesis object and then gives it some text to say. (For more information on using SpeechSynthesis, see System.Speech.Synthesis.)
Run the application
It's time to build, deploy, and launch the "Hello World" UWP app to see what it looks and sounds like. Here's how.
-
Use the Play button (it has the text Local Machine) to start the application on the local machine.

(Alternatively, you can choose Debug > Start Debugging from the menu bar or press F5 to start your app.)
-
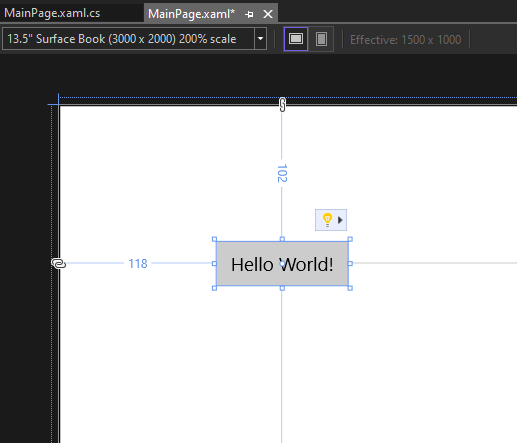
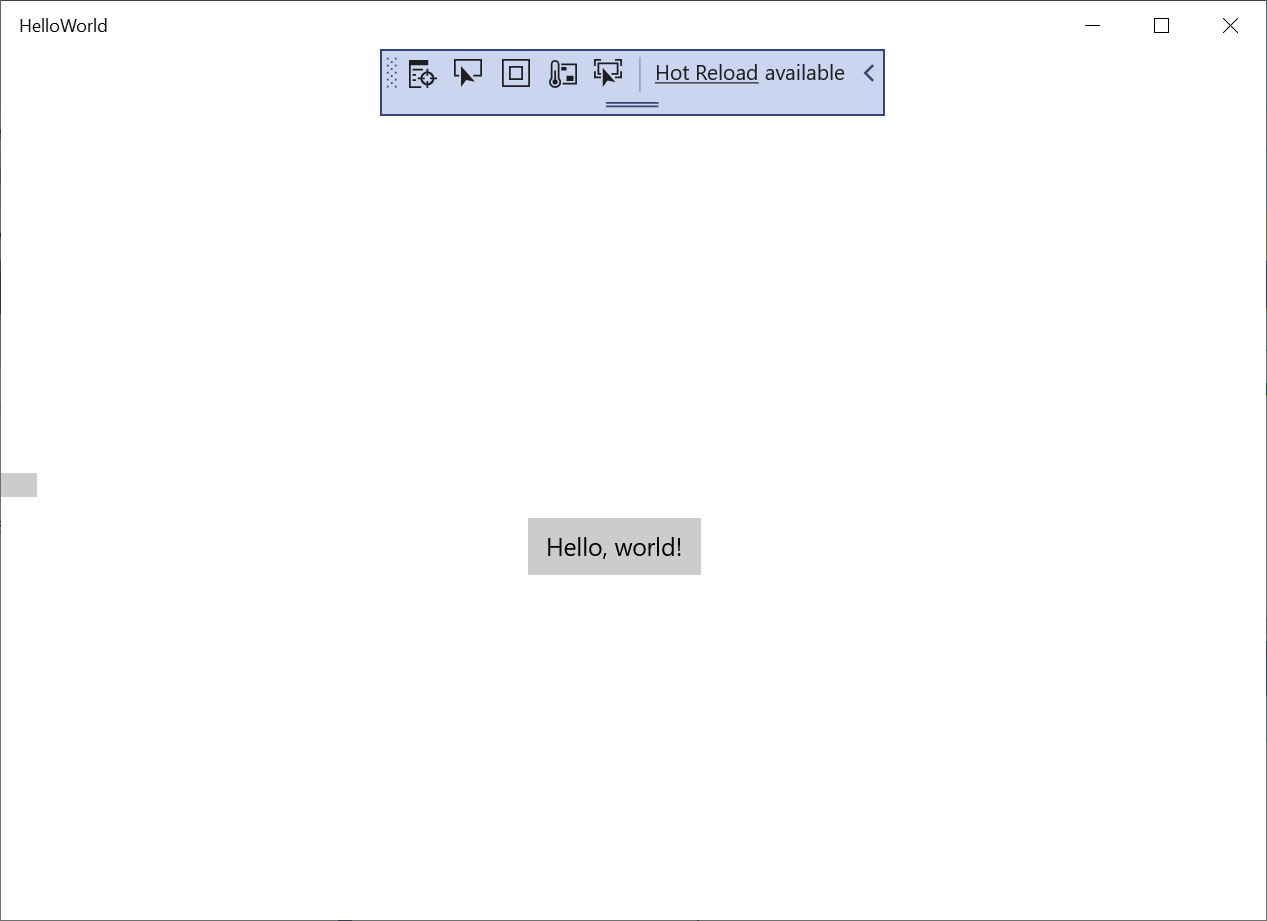
View your app, which appears soon after a splash screen disappears. The app should look similar to this:
-
Click the Hello World button.
Your Windows 10 or later device will literally say, "Hello, World!"
-
To close the app, click the Stop Debugging button in the toolbar. (Alternatively, choose Debug > Stop debugging from the menu bar, or press Shift+F5.)
It's time to build, deploy, and launch the "Hello World" UWP app to see what it looks and sounds like. Here's how.
-
Use the Play button (it has the text Local Machine) to start the application on the local machine.
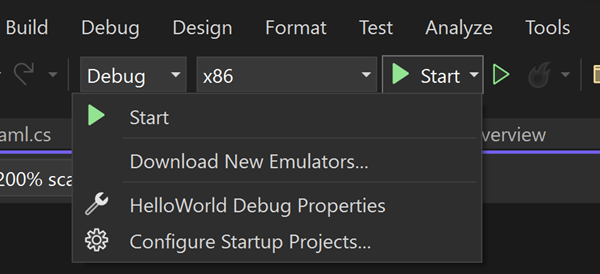
(Alternatively, you can choose Debug > Start Debugging from the menu bar or press F5 to start your app.)
-
View your app, which appears soon after a splash screen disappears. The app should look similar to this image:

-
Select the Hello World button.
Your Windows 10 or later device will literally say, "Hello, World!".
-
To close the app, select the Stop Debugging button in the toolbar. (Alternatively, choose Debug > Stop debugging from the menu bar, or press Shift+F5.)
Next steps
Congratulations on completing this tutorial! We hope you learned some basics about UWP and the Visual Studio IDE. To learn more, continue with the following tutorial:
See also
- UWP overview
- Get UWP app samples
Feedback
Submit and view feedback for
Source: https://docs.microsoft.com/en-us/visualstudio/get-started/csharp/tutorial-uwp
0 Response to "Create Class From Azure Easy Table Universal Windows App C"
Enregistrer un commentaire